In recent years, biochar has become a buzzword among sustainable gardeners—and for good reason. This ancient soil enhancer, used for centuries in the Amazon basin, is now being rediscovered as a powerful tool for improving soil health, retaining nutrients, and even fighting climate change.
If your garden soil feels depleted, compacted, or hard to keep moist, biochar might be exactly what it needs. But what is biochar, and how can you make it at home? This guide breaks down everything you need to know—from understanding its benefits to safely producing your own batch for the garden.
What Is Biochar?
Biochar is a form of charcoal made from organic materials (like wood, crop waste, or leaves) that have been heated in a low-oxygen environment—a process known as pyrolysis. Unlike ash, which is the result of complete burning, biochar retains a stable carbon structure filled with tiny pores.
These pores act like microscopic sponges, holding water, nutrients, and beneficial microbes. When added to soil, biochar improves its structure, boosts fertility, and enhances microbial activity—all while locking carbon underground for hundreds or even thousands of years.
In short, biochar turns plant waste into a long-lasting soil enhancer instead of letting it decompose and release carbon dioxide into the atmosphere.
Why Use Biochar in the Garden?
The benefits of biochar go far beyond simple fertilization. Here’s why many gardeners consider it a game changer:
1. Improves Soil Structure
Biochar’s porous texture increases aeration in heavy clay soils and helps sandy soils retain moisture. This leads to better root development and healthier plants.

2. Boosts Nutrient Retention
Because of its high surface area and electrical charge, biochar holds onto nutrients like nitrogen, potassium, and phosphorus, preventing them from leaching away. That means your plants get more from every bit of fertilizer you apply.
3. Encourages Microbial Life
Biochar provides ideal habitats for beneficial bacteria and fungi. These microbes form symbiotic relationships with plant roots, aiding in nutrient uptake and disease resistance.
4. Reduces Soil Acidity
Biochar tends to be slightly alkaline, which can help neutralize acidic soils—especially beneficial for vegetables and perennials that prefer near-neutral conditions.
5. Acts as a Long-Term Carbon Sink
Unlike compost, which breaks down within a few years, biochar remains stable in the soil for centuries. This makes it an effective way to sequester carbon and reduce greenhouse gases.
6. Reduces Odor and Runoff
When added to compost piles, livestock bedding, or garden soil, biochar absorbs smells and prevents nutrients from washing away during rain.
What You’ll Need to Make Biochar
Before you start, it’s important to gather the right tools and materials. Making biochar can be as simple as using a backyard fire pit—or as advanced as building a small pyrolysis kiln.
Materials:

- Dry, untreated organic waste (wood chips, branches, corn cobs, bamboo, coconut shells, or dried weeds)
- A safe burning area or metal container
- A method to quench the fire (water or soil)
- A shovel or metal rake
- Protective gloves and eyewear
Avoid: Treated or painted wood, plastics, or trash—these release harmful toxins when burned.
The Science Behind the Process: Pyrolysis
Pyrolysis is the controlled heating of organic material in limited oxygen, causing it to decompose chemically rather than combust fully. In this process:
- Volatile gases (like methane and carbon dioxide) are released.
- The remaining material—pure carbon—is left behind as biochar.
The key is control: you want the material to char, not burn to ash. That’s what keeps the carbon structure intact.
Step-by-Step: How to Make Biochar at Home

There are several methods to produce biochar, but here’s a simple, safe, and effective way to make it in your own backyard using common tools.
Step 1: Choose a Safe Location
Pick an open area away from buildings, dry vegetation, and flammable materials. A metal barrel, old grill, or fire pit works well. Line the area with bricks or stones to contain the fire.
Step 2: Prepare the Feedstock
Cut your organic material into small, even pieces—ideally 1–3 inches long. Smaller pieces char more evenly and faster. Make sure the material is dry, as moisture slows down pyrolysis and produces more smoke.
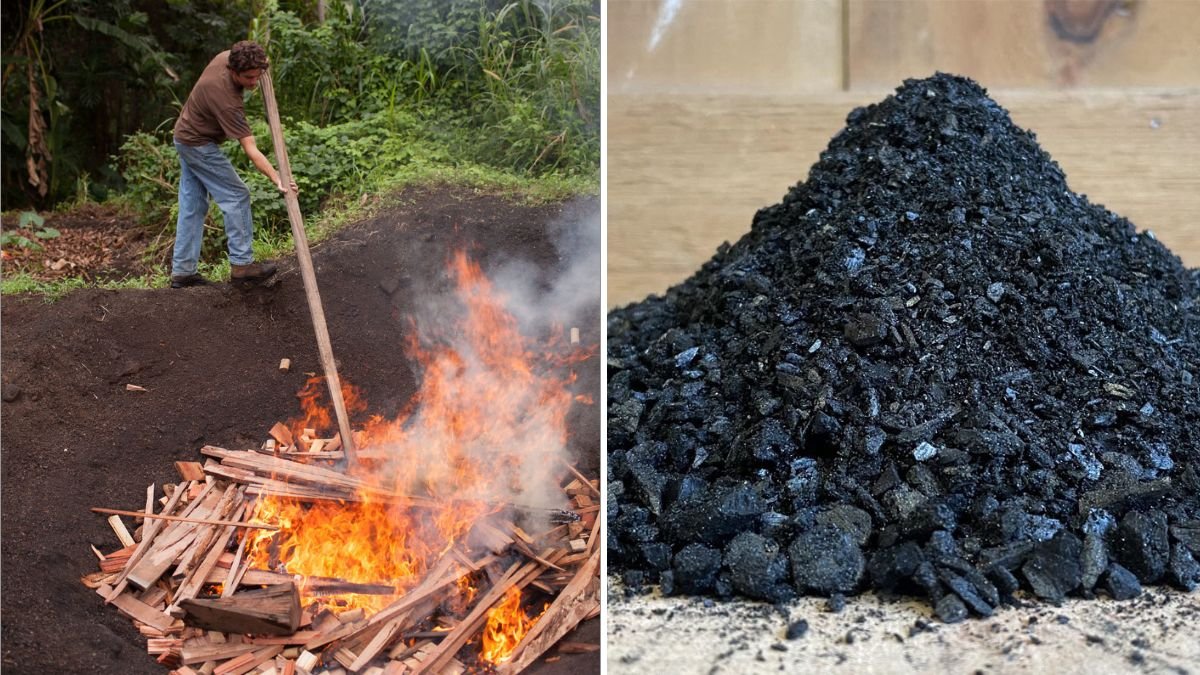
Step 3: Build the Fire (Two-Layer Method)
Start by lighting a small fire at the base using dry sticks or kindling. Once it’s burning steadily, add your organic material on top in layers.

As the lower material begins to char, keep adding more on top. This helps restrict oxygen to the lower layers, preventing them from burning completely to ash.
Tip: Watch for color changes. When the material turns black but hasn’t turned to gray ash, it’s time to stop the burn.
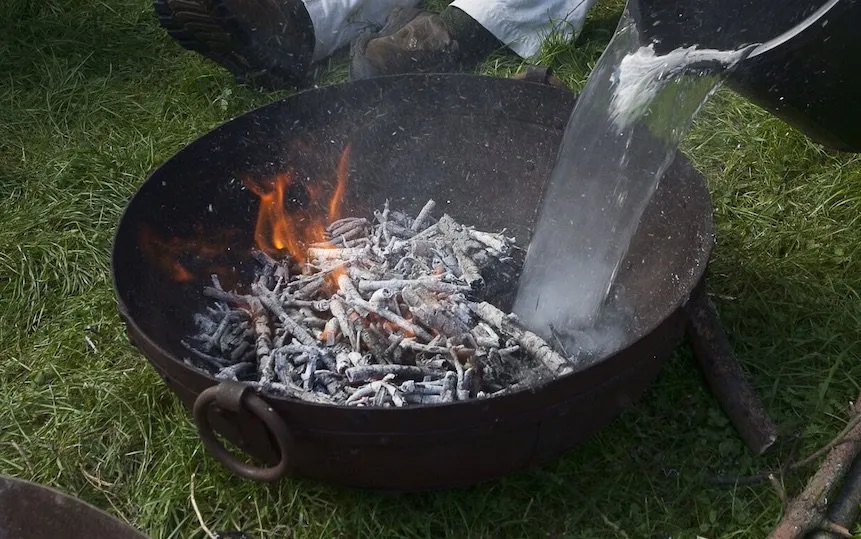
Step 4: Smother the Fire (Quenching)
Once your material has turned mostly to charcoal, it’s crucial to stop the burn quickly. You can do this by:
- Spraying or dousing the fire with water, OR
- Covering it with soil to cut off oxygen.
Be careful—steam and hot embers can cause burns. Stir gently to ensure everything cools evenly.
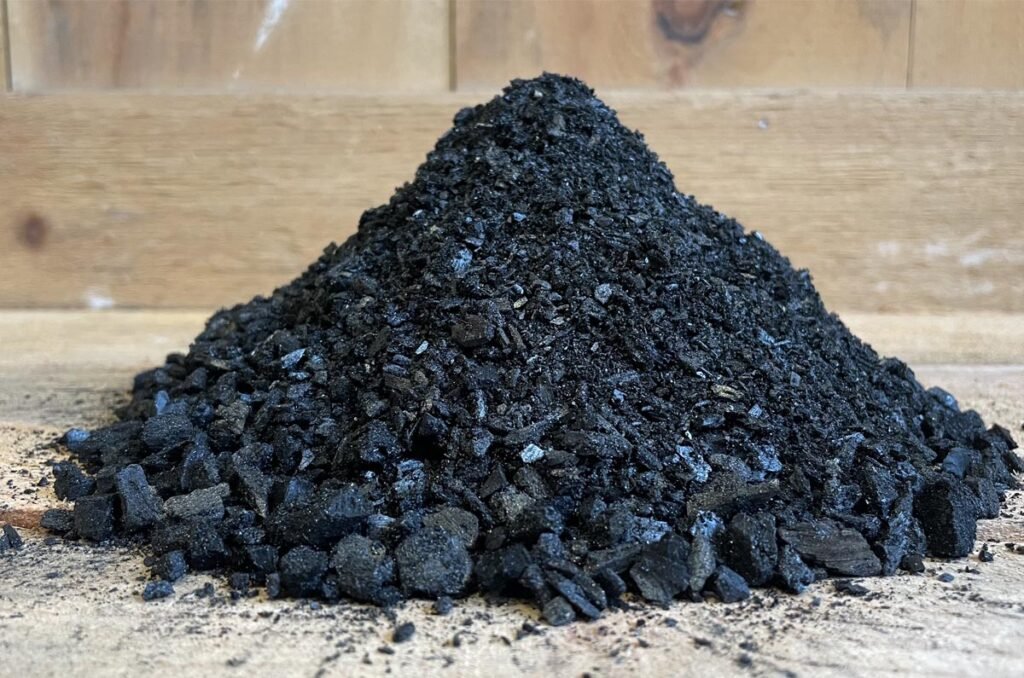
Step 5: Break and Dry the Biochar
After cooling, crush the charred pieces into smaller fragments (about the size of coarse sand or small pebbles). Spread them out to dry in the sun for a day or two.
At this stage, you have raw biochar—but before adding it to your garden, there’s one more critical step: charging it.
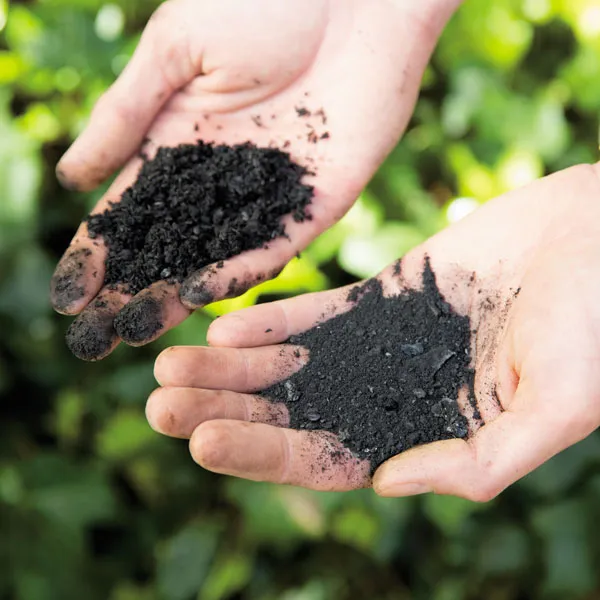
Why “Charging” Biochar Matters

Fresh biochar is like a dry sponge—it’s great at soaking up nutrients, but if you add it to soil immediately, it can actually absorb nutrients away from your plants, causing temporary deficiencies.

To prevent this, you need to charge or inoculate your biochar by pre-loading it with nutrients and microbes before use.
How to charge biochar:
- Mix it with compost and let it sit for 2–3 weeks.
- Soak it in liquid fertilizer (like compost tea, seaweed extract, or diluted manure).
- Add it to your compost pile during active decomposition.
Once charged, the biochar becomes a powerhouse of stored nutrients and living microbes—ready to enrich your soil.
How to Use Biochar in the Garden
Once your biochar is charged, there are several effective ways to apply it.
1. Mix Into Garden Beds
Blend it into the top 6 inches of soil before planting. Use about 5–10% biochar by volume (that’s roughly one part biochar to 9 parts soil). Over time, you can increase the ratio as the soil adjusts.
2. Add to Compost
Mix biochar into your compost pile (up to 10–15% of total volume). It helps absorb odors, balance pH, and prevent nitrogen loss during decomposition.
3. Use as a Mulch
Sprinkle biochar around perennials, shrubs, or trees. It regulates moisture, suppresses weeds, and gradually enriches the soil below.

4. Blend Into Potting Mix
For containers or raised beds, mix a small portion (5–10%) of biochar into your potting soil. It improves drainage and reduces nutrient loss from frequent watering.
Precautions and Best Practices
- Avoid Overuse: A little goes a long way. Too much biochar at once can make soil temporarily alkaline.
- Combine With Organic Matter: Biochar works best when paired with compost or manure—it’s not a fertilizer on its own.
- Stay Safe: Wear gloves, protective clothing, and a mask when handling fine charcoal dust.
- Monitor pH: Especially in already alkaline soils, biochar may need balancing with acidic compost or peat moss.
Biochar and Sustainability
Beyond the garden, biochar plays a role in global sustainability. By converting waste biomass into stable carbon, biochar production:
- Reduces methane emissions from decomposing organic waste.
- Captures and stores carbon that would otherwise return to the atmosphere.
- Creates a valuable soil amendment that reduces the need for chemical fertilizers.
In other words, every batch of biochar you make helps not just your garden—but the planet.
Final Thoughts
Biochar is more than a gardening trend—it’s a bridge between ancient wisdom and modern sustainability. Whether you’re improving poor soil, reducing fertilizer use, or simply making the most of your garden waste, biochar offers a long-term, eco-friendly solution.
Making it at home requires care and patience, but the results are worth it: richer soil, healthier plants, and a greener footprint. Once you’ve added biochar to your garden, you’ll notice stronger root systems, fewer watering needs, and crops that seem to thrive even in challenging conditions.
In a world focused on short-term fixes, biochar stands out as a long-term investment—in your soil, your harvests, and the environment. With a few simple tools and some organic waste, you can transform your backyard into both a productive garden and a small step toward a more sustainable planet.