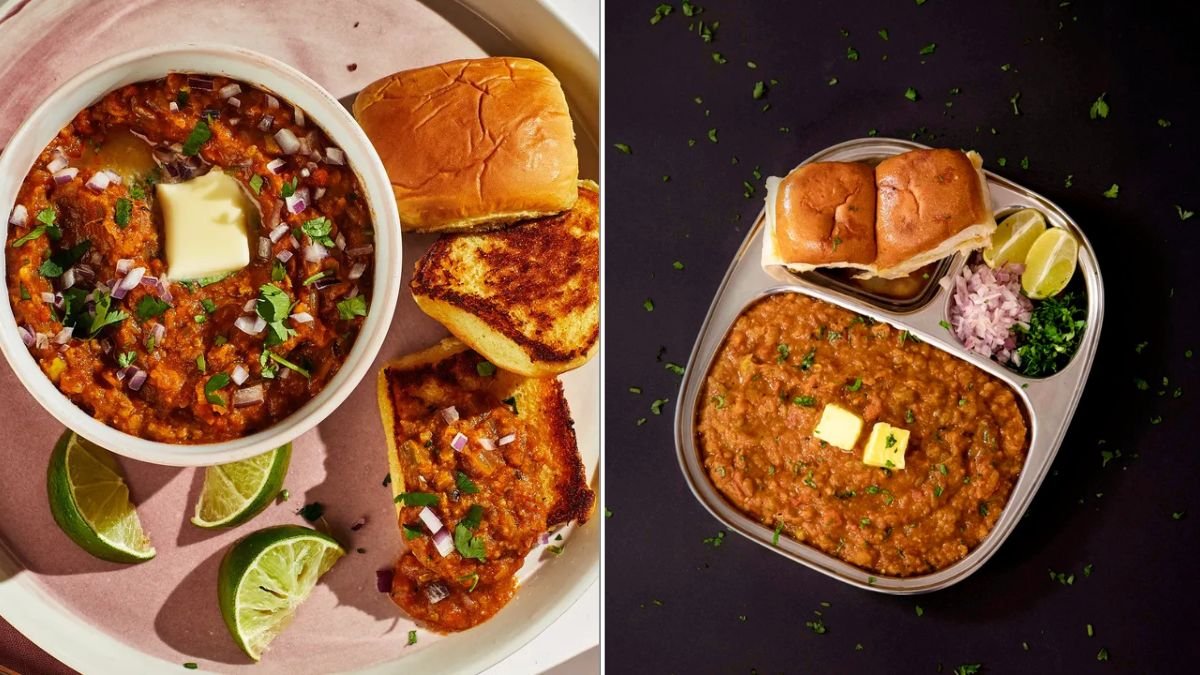
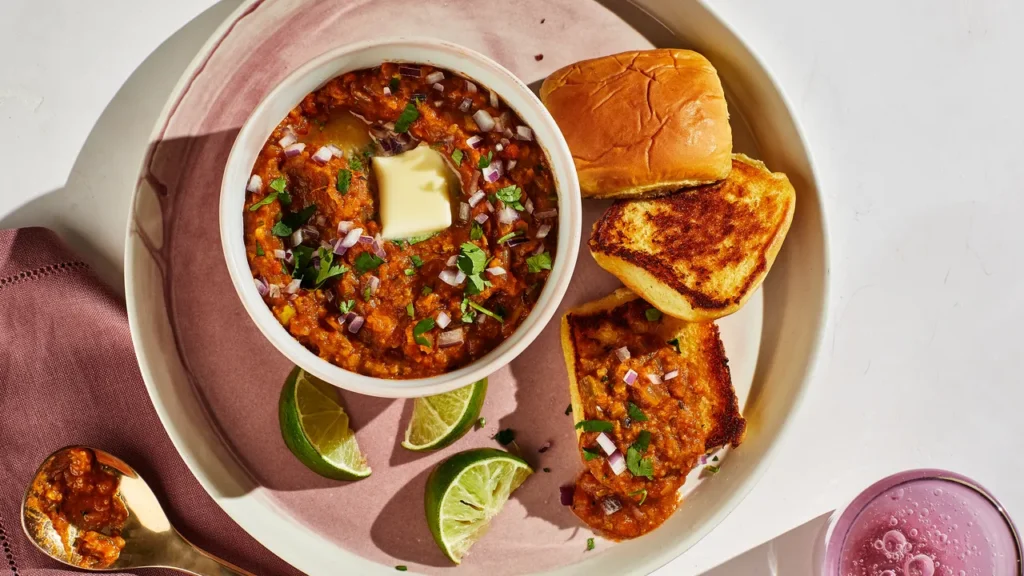
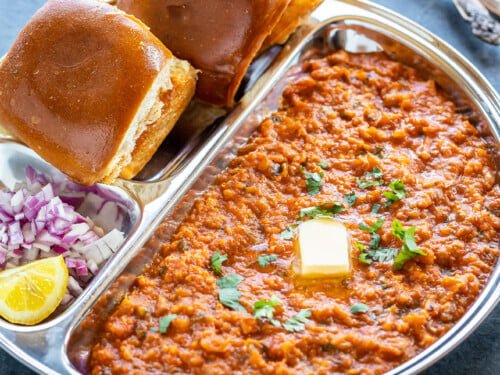
Few dishes capture the spirit of Indian street food quite like Pav Bhaji — a vibrant, buttery medley of mashed vegetables simmered in spices and served with soft, toasted buns dripping in butter. It’s hearty, comforting, and bursting with layers of flavor. Whether you’re walking down Mumbai’s Chowpatty beach or cooking it at home for a weekend treat, Pav Bhaji never fails to delight.
But here’s the secret: the difference between average Pav Bhaji and unforgettable Pav Bhaji lies in how you build its flavor — the choice of vegetables, how you roast your spices, and the way you finish it with butter, lemon, and coriander.
In this guide, you’ll learn 5 easy steps to make Pav Bhaji extra flavorful — the kind that tastes like it came straight from the best street stall in Mumbai.
Step 1: Gather and Prep the Perfect Ingredients
Every great dish begins with fresh, high-quality ingredients — and Pav Bhaji is no exception. The flavor of your bhaji depends on the right mix of vegetables and spices.
Main Ingredients:
- Potatoes (Aloo) – 3 medium, peeled and cubed
- Cauliflower (Gobi) – 1 cup, chopped into small florets
- Green Peas (Matar) – ½ cup (fresh or frozen)
- Carrots – 1 small, chopped
- Capsicum (Bell Pepper) – ½ cup, finely chopped
- Tomatoes – 3 large, finely chopped
- Onions – 2 medium, finely chopped
- Ginger-Garlic Paste – 1 tablespoon
- Green Chilies – 2, finely chopped
- Butter – 4 tablespoons (or more for richness)
- Oil – 2 tablespoons
- Salt – to taste
- Fresh Coriander Leaves – 2 tablespoons, chopped (for garnish)
- Lemon Wedges – for serving
Spices:
- Pav Bhaji Masala – 2½ tablespoons (Everest or homemade)
- Red Chili Powder – 1 teaspoon
- Turmeric Powder – ½ teaspoon
- Kashmiri Chili Powder – ½ teaspoon (for color)
- Cumin Seeds (Jeera) – ½ teaspoon
- Dry Kasuri Methi (Fenugreek Leaves) – ½ teaspoon (crushed)
For Pav (Buns):
- Pav (Soft Dinner Rolls) – 8 pieces
- Butter – for toasting
- Pav Bhaji Masala or Chaat Masala – a pinch, for flavor while toasting
Pro Tips Before Cooking:
- Choose starchy potatoes — they mash better and give bhaji a smooth, creamy texture.
- Use ripe, juicy tomatoes for natural tanginess.
- A little capsicum goes a long way — too much can overpower the flavor.
- Homemade Pav Bhaji masala (made with roasted coriander, cumin, fennel, and garam masala) always adds deeper flavor.
Step 2: Boil and Mash the Vegetables
The foundation of Pav Bhaji lies in its silky, mashed vegetable base — smooth yet slightly chunky.

- In a large pot or pressure cooker, add:
- Potatoes, cauliflower, peas, and carrots.
- 2 cups of water and a pinch of salt.
- Cook until the vegetables are soft — about 2 whistles in a pressure cooker or 15 minutes on the stovetop.
- Drain any excess water (but save some for adjusting consistency later).
- Mash the vegetables using a potato masher or the back of a spoon until creamy with small chunks left for texture.
The trick is to mash them well, but not into a paste — you want the bhaji to have body and richness.
Pro Tip:
Add a small cube of butter while mashing — it helps blend the flavors and gives a smooth, glossy texture right from the start.
Step 3: Make the Aromatic Base (The Bhaji Masala Mixture)
This is where the heart of your Pav Bhaji is built — the deep, rich masala base.
- In a large flat pan or tawa (preferred for even heat), heat 2 tablespoons of butter and 1 tablespoon of oil.
- Add ½ teaspoon cumin seeds and let them crackle.
- Add chopped onions and sauté until they turn golden brown.
- Add ginger-garlic paste and green chilies; cook until the raw aroma disappears.
- Add finely chopped tomatoes and a pinch of salt. Cook until the tomatoes break down completely and the oil separates from the masala — this step can take 8–10 minutes, and patience here pays off!
Now add the dry spices:
- Pav Bhaji masala
- Red chili powder
- Turmeric powder
- Kashmiri chili powder
Mix well and cook for another 2–3 minutes until fragrant.

At this stage, the masala should look rich, oily, and aromatic.
Pro Tip:
Sprinkle a few drops of water occasionally to prevent burning — this ensures the spices roast evenly, unlocking deeper flavors.
Step 4: Combine, Mash, and Simmer for Deep Flavor
Now comes the best part — combining the mashed vegetables with the masala.
- Add the mashed vegetables to the pan. Mix well to coat everything in the spice mixture.
- Add ½ to 1 cup of reserved water to adjust the consistency. Pav Bhaji should be thick and creamy, not watery.
- Using a masher directly on the pan, mash the mixture again while it simmers. This step helps blend the flavors beautifully.
- Let the bhaji simmer on low heat for 10–15 minutes, stirring occasionally.
During this simmering time, the spices infuse deeply into the vegetables — that’s what makes the bhaji taste better with every minute.
Finally, stir in:

- 2 tablespoons butter
- ½ teaspoon garam masala or extra Pav Bhaji masala
- ½ teaspoon crushed kasuri methi
Let it all blend together into a rich, glossy, buttery mix that smells irresistible.
Pro Tip:
If you want restaurant-style Pav Bhaji, add a tablespoon of finely chopped capsicum toward the end for crunch and color.
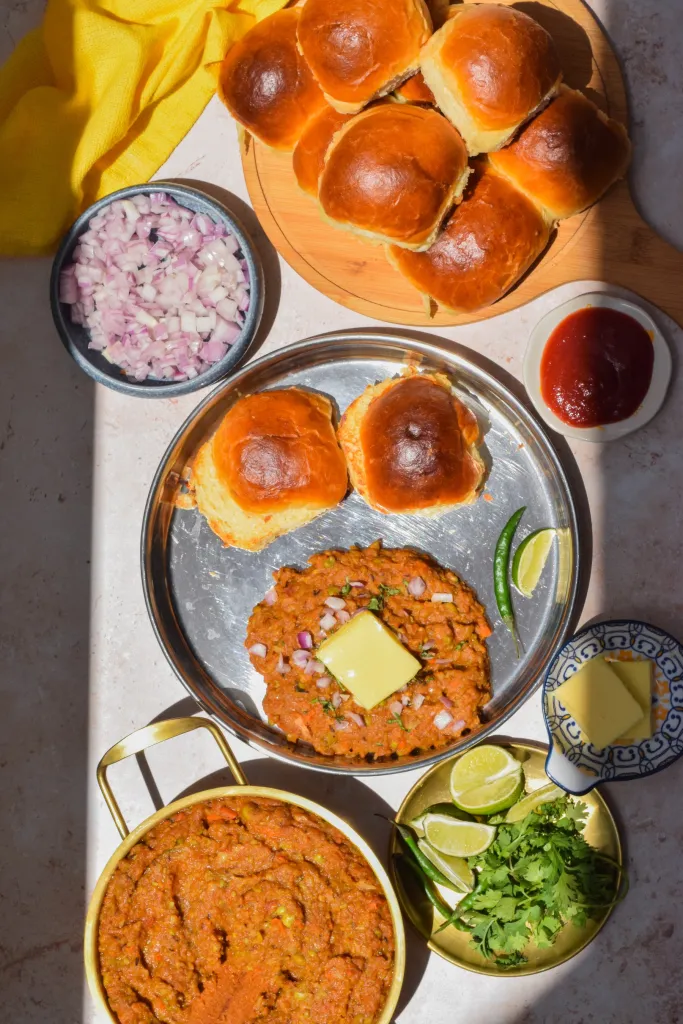
Step 5: Toast the Pav and Serve with Style
Now that your bhaji is ready, it’s time to prepare the pav (the soft dinner rolls). This step may seem simple, but it makes a huge difference in the overall experience.
- Heat a flat pan or tawa and melt a generous spoonful of butter.
- Sprinkle a pinch of Pav Bhaji masala or chaat masala directly on the butter.
- Slice the pav buns in half horizontally and place them on the tawa, cut side down.
- Toast until they’re golden, crisp, and slightly soaked in the spiced butter.
Repeat until all pavs are toasted and ready to serve.
Pro Tip:
If you’re hosting guests, lightly toast the pavs first and give them a final warm-up right before serving — they’ll stay crisp yet soft inside.

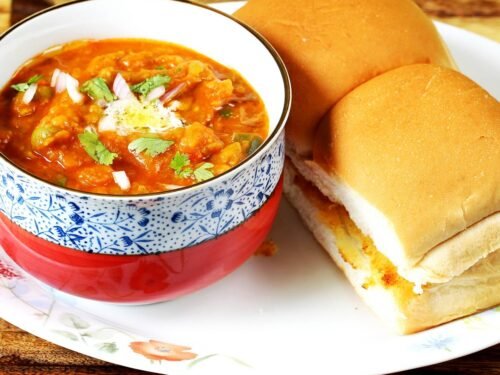
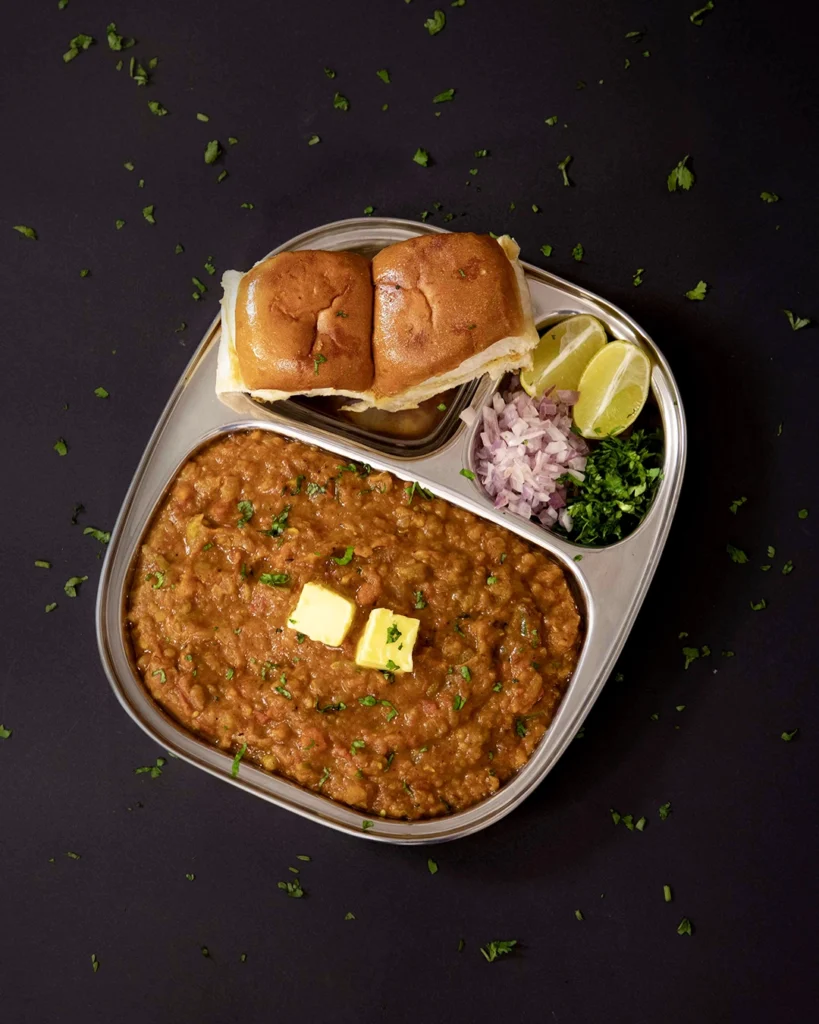
Serving the Perfect Pav Bhaji
Now comes the moment of truth — plating your masterpiece!
To Serve:
- Spoon a generous portion of bhaji onto a plate.
- Top with a dollop of butter — it melts into the bhaji and adds irresistible richness.
- Sprinkle chopped coriander leaves and finely chopped onions on top.
- Serve with two toasted pavs, a lemon wedge, and a side of chopped onions.
Optional Toppings:
- Add a swirl of butter and a sprinkle of cheese for a “Mumbai cheese pav bhaji” twist.
- Garnish with a little cream or kasuri methi for a restaurant-style finish.
Bonus Tips for Extra Flavor
- Use a mix of butter and oil: Butter gives richness, while oil prevents it from burning.
- Simmer longer: The more your bhaji simmers, the deeper and more balanced the flavors become.
- Roast your masala: Lightly roast the Pav Bhaji masala before adding it for a stronger aroma.
- Add butter at stages: Add butter while mashing, simmering, and finishing for layered richness.
- Use a wide pan: A tawa or flat pan gives that authentic street-style roasted flavor.
- Homemade masala boost: Mix 2 tsp coriander powder, 1 tsp cumin powder, ½ tsp garam masala, and a pinch of fennel seeds powder — add it to the bhaji for an unforgettable depth.
Why Pav Bhaji Is So Beloved
- Versatile: It’s perfect for breakfast, dinner, or as a party snack.
- Comforting: The buttery, spiced bhaji is pure soul food.
- Nutritious: Packed with vegetables but delicious enough for picky eaters.
- Crowd-Pleaser: Great for family dinners or festive gatherings.
- Customizable: Add paneer, cheese, or even mushrooms for creative twists.
Pav Bhaji isn’t just a meal — it’s an emotion tied to Indian street culture. The sizzling tawa, the spicy aroma, the sound of butter melting — it all creates an experience that’s as nostalgic as it is delicious.
Final Thoughts
With these 5 easy steps, you can now make Pav Bhaji that’s rich, flavorful, and absolutely irresistible — just like your favorite street vendor’s version.
Here’s a quick recap:

- Prep fresh veggies and spices.
- Boil and mash them perfectly.
- Build your masala base with patience.
- Simmer for depth and buttery richness.
- Toast the pav with spiced butter.
And there you have it — Pav Bhaji that’s spicy, buttery, and bursting with flavor in every bite. So grab your tawa, stack up those pavs, and get ready to treat your taste buds to the ultimate Mumbai-style experience.