
If you’re craving restaurant-style Indian appetizers but want to make them right at home, paneer tikka skewers are the perfect choice. Bursting with flavor, marinated in spices, and perfectly charred in the oven, these paneer tikka skewers are a hit at parties, family dinners, or even a weeknight treat.
This 7-step guide to making paneer tikka skewers in the oven ensures you get soft, juicy paneer cubes with a smoky, slightly charred exterior, paired with crisp vegetables. Ideal for American kitchens, this recipe is easy to follow, customizable, and packed with authentic flavor.
Step 1: Gather Fresh Ingredients

Great paneer tikka starts with fresh, high-quality ingredients. Here’s what you’ll need for 4 servings:
For the Skewers:

- 400g paneer, cut into 1-inch cubes
- 1 cup bell peppers (red, green, yellow), cut into cubes
- 1 cup onions, cut into squares
- 1 zucchini or baby corn (optional)
For the Marinade:
- ½ cup thick yogurt (Greek yogurt works well)
- 1 tbsp ginger-garlic paste
- 1 tsp turmeric powder
- 1 tsp red chili powder (adjust to taste)
- 1 tsp garam masala
- 1 tsp coriander powder
- 1 tsp cumin powder
- 1 tbsp lemon juice
- 2 tbsp oil (plus extra for brushing)
- Salt to taste
Optional Garnishes:
- Fresh cilantro
- Lemon wedges
- Chaat masala for extra zing
Pro Tip: Use fresh, firm paneer for the best texture. Homemade or store-bought paneer works equally well.
Step 2: Prepare the Paneer and Vegetables
Before marinating, prep the ingredients for even cooking:

- Cut paneer into uniform 1-inch cubes to ensure they cook evenly.
- Chop bell peppers, onions, and optional vegetables into roughly the same size as paneer cubes.
- If using wooden skewers, soak them in water for 30 minutes to prevent burning in the oven.
Tip: Uniformly sized paneer and vegetables ensure all pieces cook evenly and achieve that perfect char.
Step 3: Make the Marinade

The secret to juicy, flavorful paneer tikka lies in the marinade:
- In a large bowl, combine yogurt, ginger-garlic paste, turmeric, red chili powder, garam masala, coriander powder, cumin powder, lemon juice, oil, and salt.
- Mix until smooth and creamy.
- Add the paneer cubes and vegetables to the marinade. Toss gently to coat every piece.
Tip: For the best flavor, let the paneer and vegetables marinate for at least 1-2 hours in the refrigerator. Overnight marination intensifies the taste.
Step 4: Preheat the Oven and Prepare Skewers
To get the perfectly roasted paneer tikka, preheat your oven:

- Preheat the oven to 425°F (220°C) for 10 minutes.
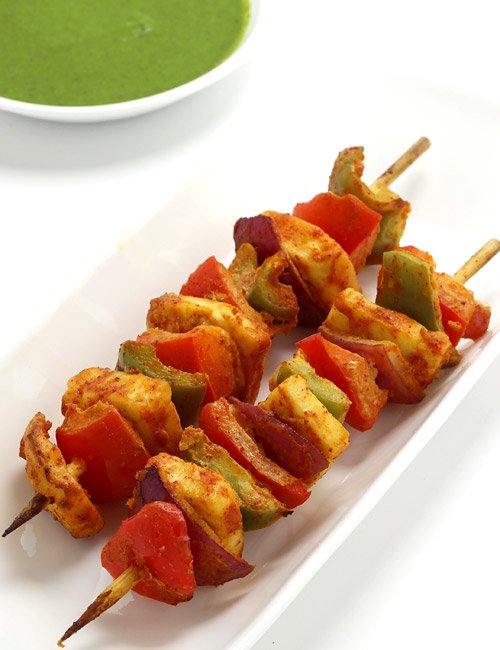
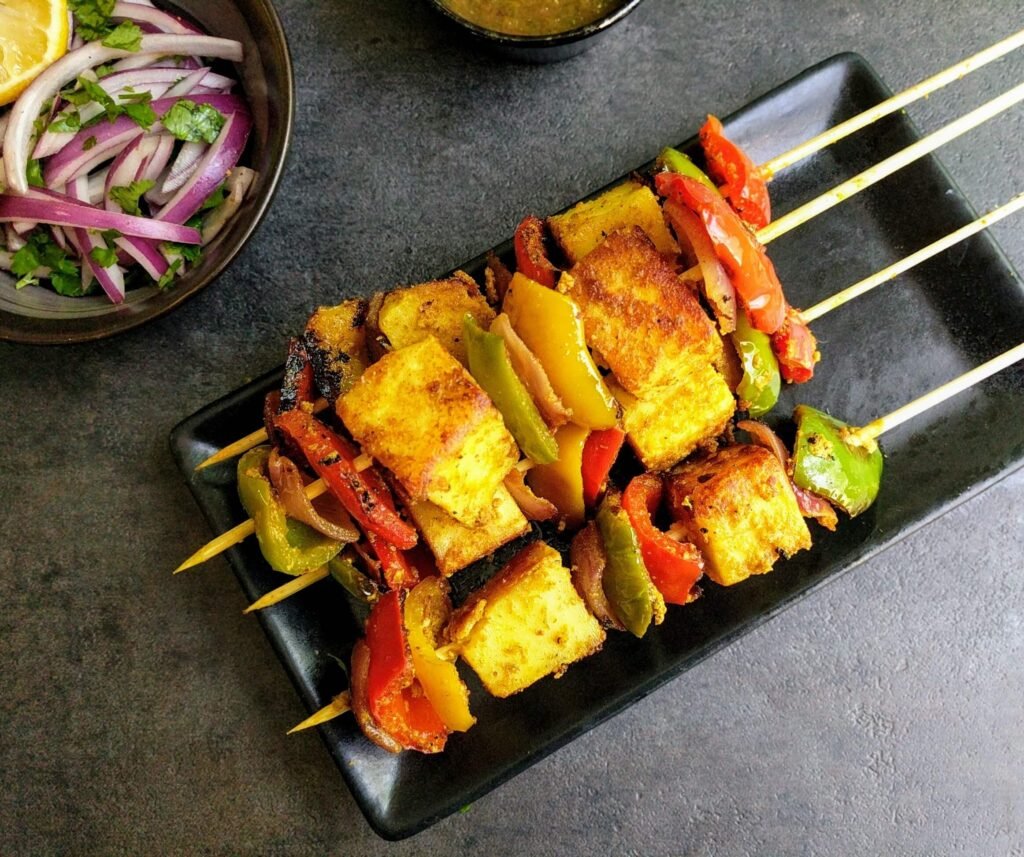
- Thread paneer and vegetables alternately onto skewers, leaving a small space between pieces to allow even cooking.
- Place skewers on a baking tray lined with aluminum foil or parchment paper.
Pro Tip: Brushing a little oil on the tray or foil prevents sticking and helps achieve a nice char on the paneer.
Step 5: Bake the Skewers
Now comes the fun part—cooking the paneer tikka to perfection:
- Place the skewers in the preheated oven.
- Bake for 15-20 minutes, turning halfway through to ensure even roasting.
- Brush a little oil or melted butter on the paneer and vegetables during cooking for extra juiciness.
Tip: Keep an eye on the skewers; the edges should be slightly charred but not burnt. This mimics the smoky flavor of traditional tandoor-cooked tikka.
Step 6: Broil for a Smoky Finish (Optional)
For a restaurant-style smoky flavor, you can broil the skewers at the end:

- Set your oven to broil on high for 2-3 minutes.
- Place the tray closer to the top rack, watching carefully to avoid burning.
- Remove once the paneer has golden brown edges and a light char.
Pro Tip: If you love an authentic tandoori flavor, you can lightly smoke the skewers using a piece of charcoal in a small bowl, covered with a lid, for a few minutes before serving.
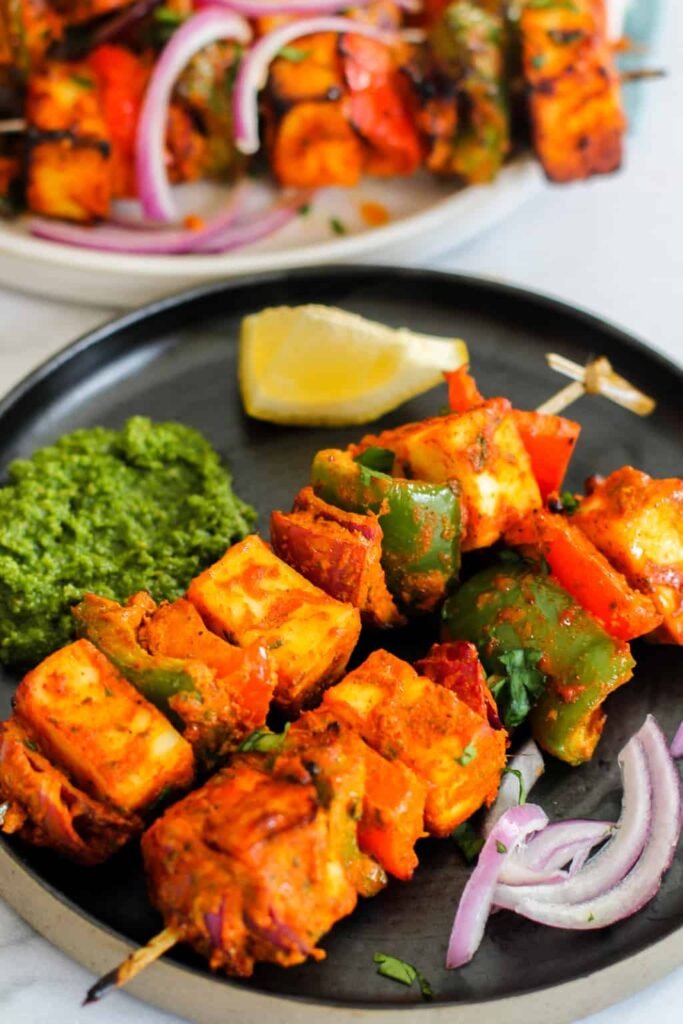
Step 7: Serve Hot with Garnishes
Serve your oven-baked paneer tikka skewers immediately for the best taste:
- Sprinkle with fresh cilantro and a pinch of chaat masala.
- Serve with lemon wedges on the side for an extra tangy kick.
- Pair with green chutney, raita, or a simple yogurt dip.
- These skewers also make a great appetizer, party snack, or side dish with naan or rice.
Tip: Paneer tikka is best enjoyed fresh, but leftover pieces can be stored in an airtight container for 1-2 days and lightly reheated.
Extra Tips for Perfect Paneer Tikka
- Marination: Longer marination enhances flavor and tenderness.
- Paneer firmness: Soft paneer may break while skewering; firm paneer holds its shape better.
- Vegetable variety: Bell peppers, onions, zucchini, mushrooms, and cherry tomatoes work well.
- Spice adjustments: Reduce red chili powder for a milder taste or increase for a spicier tikka.
- Oven alternatives: If you don’t have an oven, use a grill pan or stovetop grill with similar results.
Why Paneer Tikka Skewers Are a Must-Try
- Healthy and protein-rich: Paneer is packed with protein, and paired with fresh vegetables, it makes a balanced meal.
- Versatile: Works as an appetizer, main course, or party snack.
- Quick and easy: Ready in under 40 minutes, including prep and baking time.
- Kid-friendly: Mildly spiced and colorful, perfect for family meals.
- Restaurant-style at home: Oven-baking achieves that authentic charred flavor without a tandoor.
Conclusion
Making paneer tikka skewers in the oven is easier than you think. With this 7-step guide, you can create a juicy, flavorful, and perfectly roasted appetizer that rivals restaurant versions. From marinating paneer and vegetables to roasting and garnishing, every step ensures delicious results.

Whether you’re serving them at a family dinner, casual get-together, or a weekend treat, these paneer tikka skewers are sure to impress. Try this recipe today and bring authentic Indian flavors to your American kitchen!